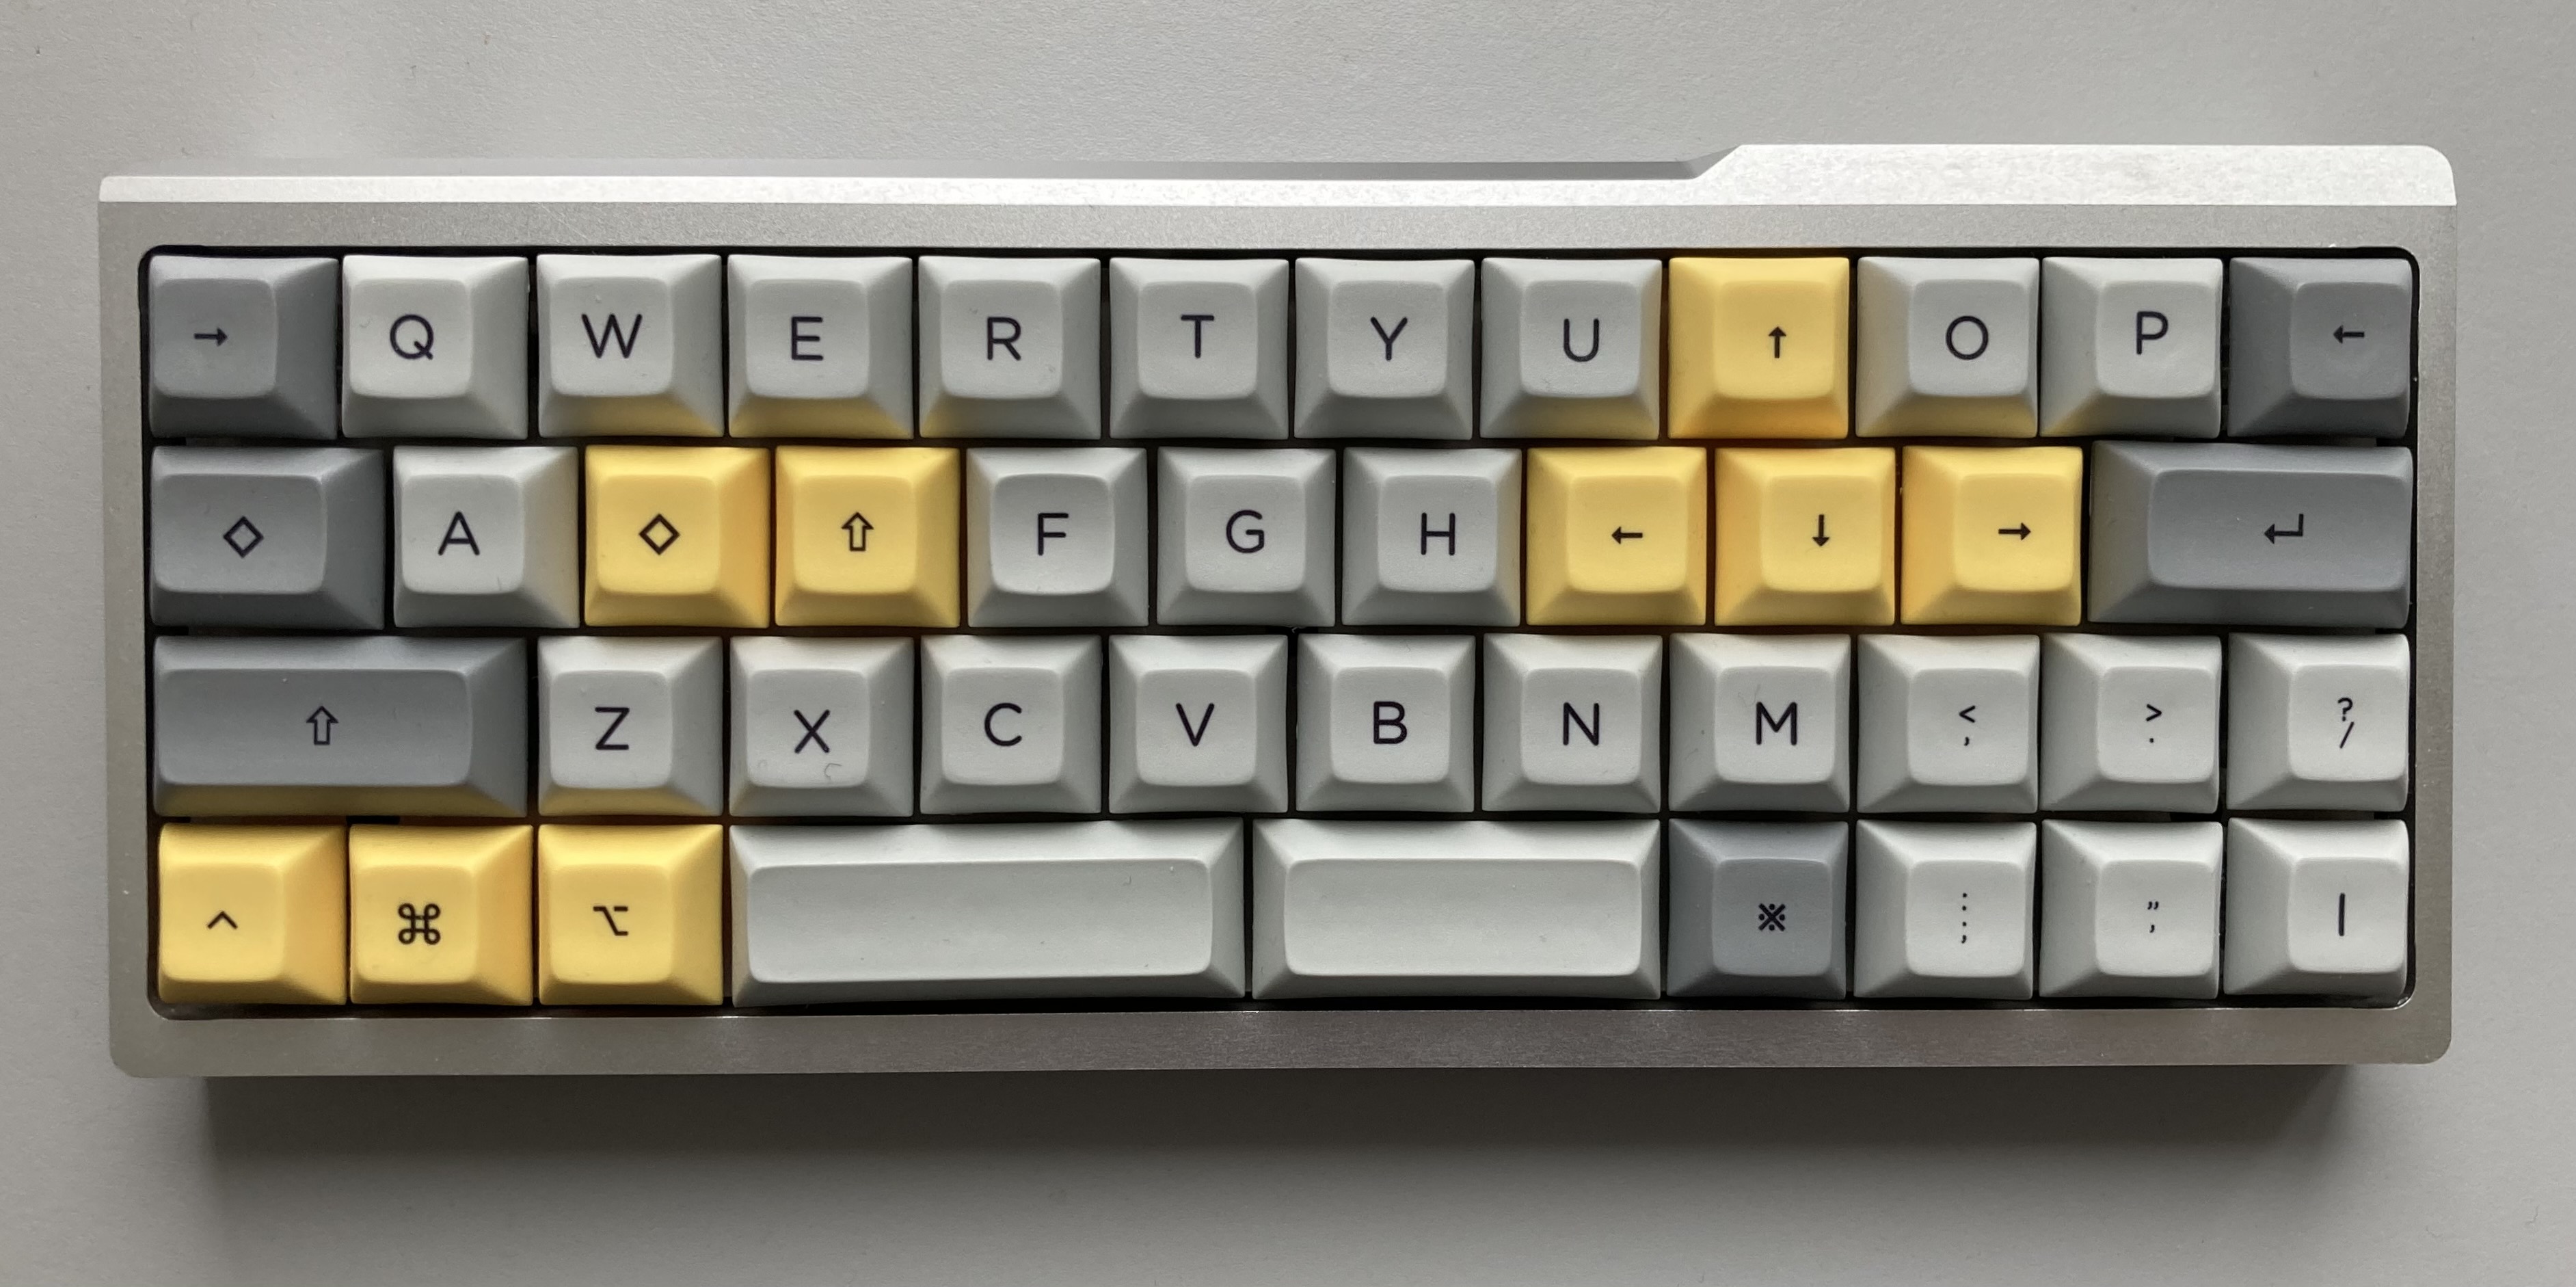
BM43A layout demo
Describing how you’ve set up your keyboard is like describing a dream - you’ll strain people’s patience and they still won’t really get it.
So I figured I would show you how my BM43A keyboard works by creating an editable text field that I’ve set up to work pretty much the same way.
Instructions are below - this demo works best on a “regular”, physical (desktop or laptop) keyboard. It doesn’t really work on a phone - sorry!
How do you type a capital “J”?
In real life, I use Caps Lock as the “magic key”, not Shift (after all, my name is Joe - I need the capital J!). Browsers don’t report Caps Lock key events very well, so the demo can’t be perfectly realistic. I think Shift gives the same overall feeling 🙂.
On my physical keyboard, I use keycaps to remind me where the special keys are.

So why do I like this so much?
The “trick” is that the keyboard just sends the regular Mac keys for text selection!
When I press Caps Lock + J
the keyboard literally sends the Left Arrow key to the computer. When I press
Caps Lock + S, the keyboard sends Alt. So Caps Lock + S + J is just Alt + Left Arrow,
which is the normal Mac shortcut to move left one word!
That means that every single text field works this way for me. Whether I’m typing in an IDE, Gmail, Word, the Chrome address bar… it just doesn’t matter. Everything works the same way.
Autocompletes are a dream as well. I’m able to type the first few letters of something
(say, key), then Google (or whatever) suggests a few items (keycap, keyboard, …)
and I’m able to immediately press Caps Lock + k to arrow down to the item I want.
I actually only discovered this after using the keyboard for a while, but it’s the thing I
miss the most when I’m using other keyboards.
Speaking of other keyboards, I found this layout really easy to get used to, and it hasn’t made it hard to adjust back and use other keyboard when I need to. It uses the same fingers (pointer, middle, and ring) that I use on the regular arrow keys, so adjusting to this keyboard just means not having to move from the home row anymore.
Making it happen
First, you need a keyboard that supports something like QMK. There are a lot of options to choose from!
Then you can follow the tutorial to set things up. Being a software engineer made things a little easier, but this does not require a lot of actual coding.
Below is the code that I’m using at the moment. It defines an array, but, if you squint, you can see that it’s pretty much a picture of the keyboard.
I’ve set the Caps Lock key to MO(1) - meaning “activate layer 1”. Then, in layer 1, S is
mapped to Alt, J is mapped to LEFT, and so on.
In order to make “go to beginning of line” work on Mac, I needed to set up a custom, synthetic
keycode MAC_HOME. Then, in process_record_user, whenever I press MAC_HOME, the keyboard
sends Cmd + Left.
#include QMK_KEYBOARD_H

enum custom_keycodes {
    MAC_HOME = SAFE_RANGE, // go to beginning of line on mac
    MAC_END,               // go to end of line on mac
};

const uint16_t PROGMEM keymaps[][MATRIX_ROWS][MATRIX_COLS] = {
    // this is the first, default layer
    [0] = LAYOUT(
        KC_TAB,  KC_Q,    KC_W,    KC_E,    KC_R,    KC_T,    KC_Y,    KC_U,    KC_I,    KC_O,    KC_P,    KC_BSPC,
        MO(1)  ,    KC_A,    KC_S,    KC_D,    KC_F,    KC_G,    KC_H,    KC_J,    KC_K,    KC_L,    KC_ENT,
        KC_LSFT,          KC_Z,    KC_X,    KC_C,    KC_V,    KC_B,    KC_N,    KC_M,    KC_COMM, KC_DOT,   KC_SLASH,
        KC_LCTL, KC_LGUI, KC_LALT, MO(2),                 KC_SPC,              MO(3),   KC_SCOLON, KC_QUOTE, KC_BSLASH
    ),
    // this is layer 1
    [1] = LAYOUT(
        KC_GRAVE,   _______, _______, _______, _______, _______, _______, _______,    KC_UP, _______, _______, _______,
        _______,   _______,KC_LALT, KC_LSFT,  _______, _______, MAC_HOME, KC_LEFT, KC_DOWN, KC_RGHT, MAC_END,
        _______,          _______, _______, _______, _______, _______, _______, _______, _______, _______, _______,
        _______, _______, _______, _______,                _______,             _______, _______, _______, _______
    ),
    //... other layers, for function keys and so on...
};

bool process_record_user(uint16_t keycode, keyrecord_t *record) {
    switch (keycode) {
    case MAC_HOME:
        if (record->event.pressed) {
            // Send "Cmd + Left"
            SEND_STRING(SS_LGUI(SS_TAP(X_LEFT)));
        }
        break;
    case MAC_END:
        if (record->event.pressed) {
            // Send "Cmd + Right"
            SEND_STRING(SS_LGUI(SS_TAP(X_RIGHT)));
        }
        break;
    }
    return true;
};
All in all, I’m really pleased to have set up the keyboard just the way I like it.